
Supply/Demand zone
This guide covers how to watch a supply or demand zone through the /zona tab. You set the zone up, and the bot then waits for price to reach it and enters with the stop-loss, targets, and size you chose. The order is forwarded directly to your own exchange account through your own API key.
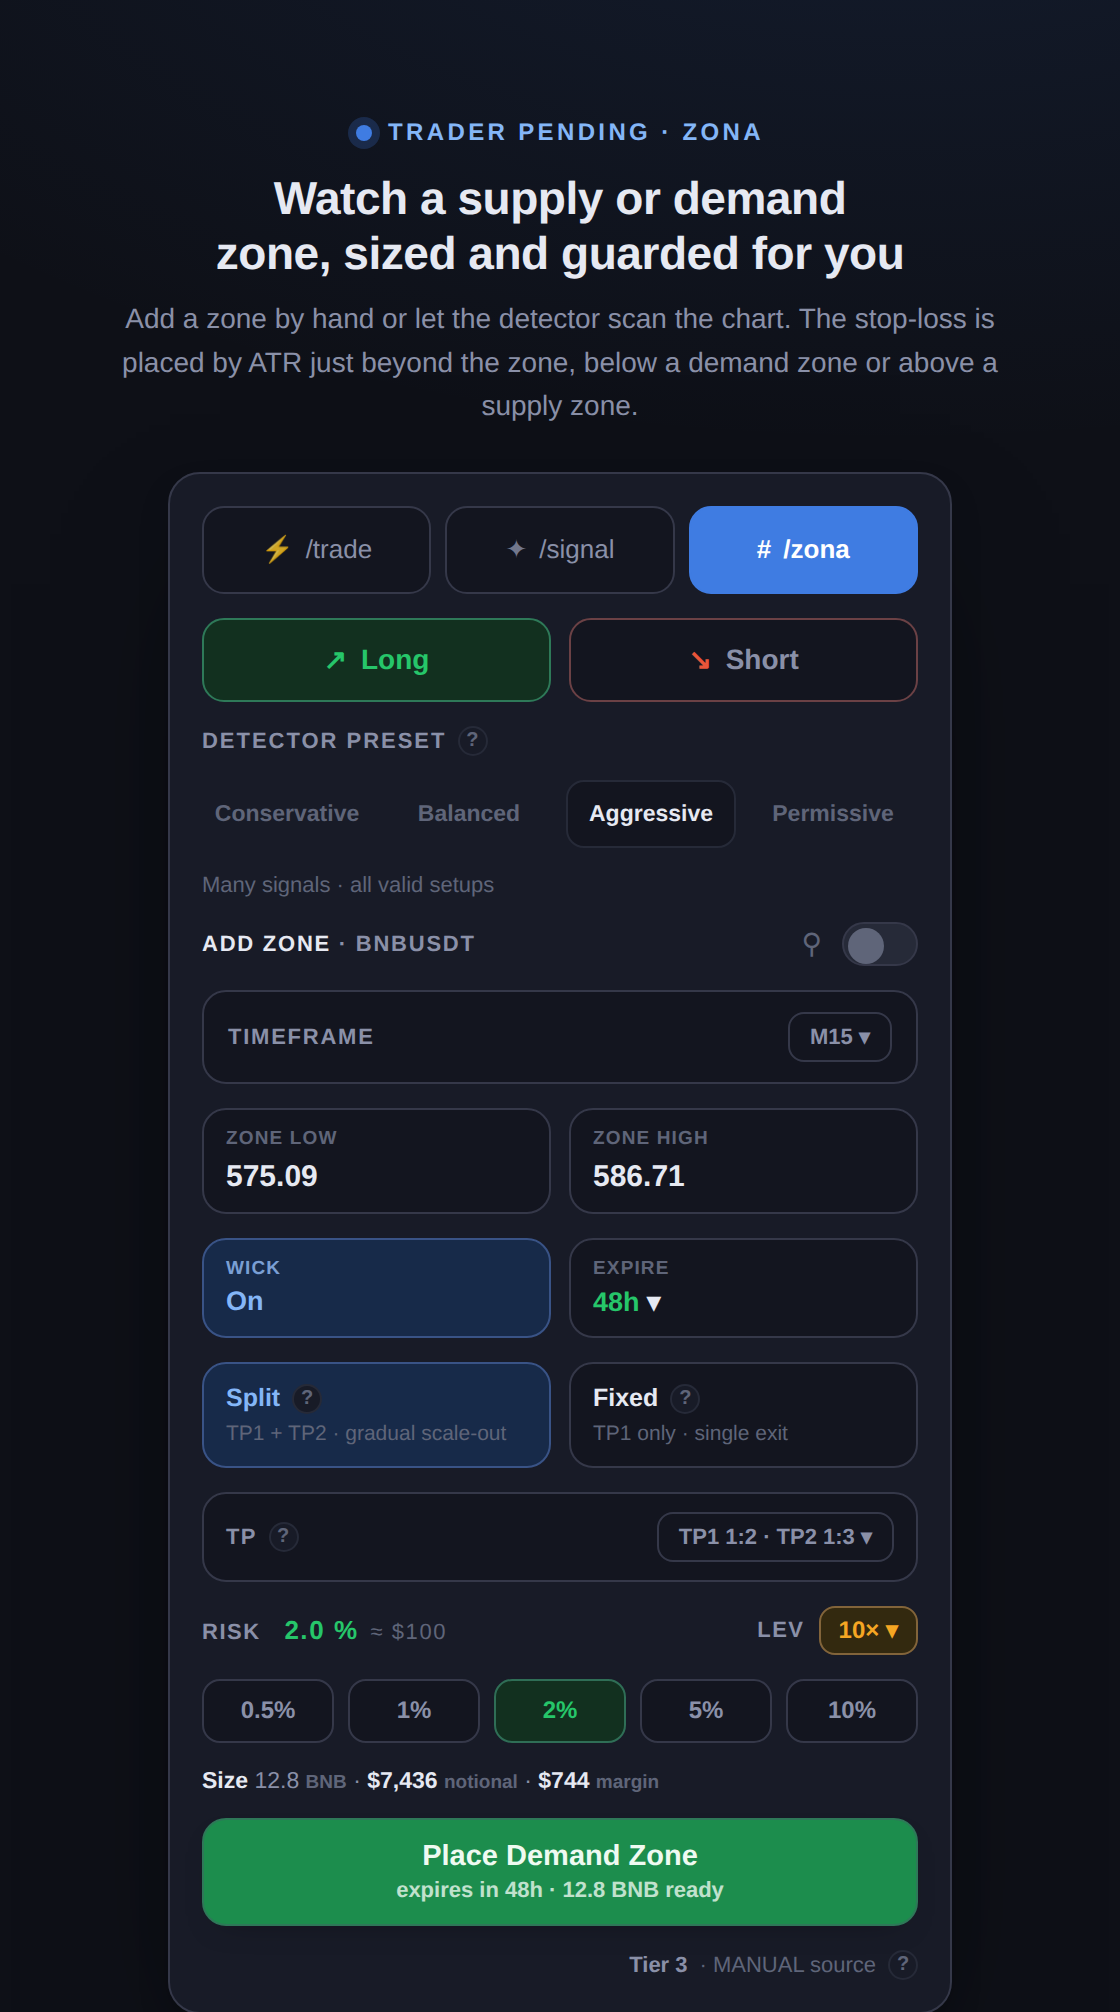
1. Direction and detector preset
Section titled “1. Direction and detector preset”- Long or Short. A demand zone is watched for Long, a supply zone for Short.
- Detector preset. Sets how strictly a zone counts as valid:
- Conservative: strict, A+ setups only.
- Balanced: default, A and B setups.
- Aggressive: more signals, all valid setups.
- Permissive: exploration, the most zones for early analysis.
2. Two ways to get a zone: Add zone or Auto-detect
Section titled “2. Two ways to get a zone: Add zone or Auto-detect”The switch on the pair row decides where the zone comes from.
- Add zone. You set the lower and upper bounds of the zone yourself (Zone low and Zone high).
- Auto-detect. The bot scans the chart for Supply/Demand zones, then you pick a pair from your watchlist, up to 50 pairs. The detector also turns on a chart overlay that marks those zones.
3. Zone settings
Section titled “3. Zone settings”- Timeframe. The candle used to read the zone.
- Zone low and Zone high. The lower and upper bounds of the zone (when adding manually).
- Wick filter. When on, triggering requires a candle wick to touch the area and then close back away, not merely graze it, which filters out false triggers.
- Expiry. If the zone has not triggered by the time limit, it is cancelled automatically.
4. Take-profit: Split or Fixed
Section titled “4. Take-profit: Split or Fixed”- Split. Two targets, TP1 and TP2, with a gradual scale-out.
- Fixed. A single target only (TP1), one exit.
- TP ratio. Targets are set as reward-to-risk ratios, for example TP1 1:2 and TP2 1:3, that is multiples of the stop distance.
5. An automatic ATR stop-loss, just beyond the zone
Section titled “5. An automatic ATR stop-loss, just beyond the zone”The stop-loss is built automatically from ATR, the market’s actual volatility, and placed just beyond the zone:
- For a demand zone (Long), the stop sits below the zone.
- For a supply zone (Short), the stop sits above the zone.
The distance is roughly half the zone’s height plus an ATR buffer, so the stop sits beyond normal price noise and outside the zone rather than inside it. This keeps the position from being swept while price still respects the zone. The stop-loss is placed directly on the exchange, so it stays in effect even if the bot connection drops.
6. Size and place
Section titled “6. Size and place”- Risk and leverage. Pick the percentage to risk per trade (0.25% up to 10%); the position size is computed from that risk divided by the stop distance. Leverage sits next to it.
- Place the zone. Press Place Demand Zone or Place Supply Zone. The zone becomes pending on the exchange until price reaches it or its validity expires.
Crypto futures trading carries high risk, including the possibility of losing part or all of your capital. Zone detection is an analysis aid, not a guarantee; the decision to place and run it remains entirely yours.