
Connect an API key
Trader Pending executes orders through your own API key, directly in your exchange account. Your funds stay on the exchange and are never held by Trader Pending, so the key only needs read and trade permission, never withdrawal.
This guide walks you through it once, from scratch. There are three parts: create the key on the exchange, add the key to Trader Pending, then move funds to your Futures wallet. Follow them in order, and do not skip the wallet part, because the bot reads your balance and executes only from the Futures wallet.
Step 1. Create the API key on the exchange
Section titled “Step 1. Create the API key on the exchange”Sign in to your exchange, open the API management page (usually under API Management or API Keys), and create a new key. As you create it, pay attention to these four things.
The right permissions
Section titled “The right permissions”- Enable Read and Trade. These two let the bot see your balance and positions and place orders.
- Enable Futures/Perpetual trading. Trader Pending is a futures platform, so your key must be able to trade contracts, not just Spot. On some exchanges this is a separate option you have to switch on. For example, on Binance you enable Enable Futures; on others it may be named Contract, Derivatives, or Perpetual. If unsure, make sure the key covers the futures/contract product, not Spot only.
- Turn Withdraw off. Trader Pending does not need and must not have access to withdraw your funds. If this permission is on, turn it off.
Passphrase (some exchanges only)
Section titled “Passphrase (some exchanges only)”Some exchanges use three-component authentication and ask for a Passphrase in addition to the API Key and Secret. On Trader Pending, the exchanges that require a passphrase are OKX, Bitget, and KuCoin. You choose the passphrase yourself when creating the key. Save it carefully, because it usually cannot be viewed again once the key is created.
Restrict by IP (optional, recommended)
Section titled “Restrict by IP (optional, recommended)”Restricting the key to the Trader Pending server IP makes it work only from our server. This is a recommended layer of security.
The server IP you need to whitelist is shown directly in the app, not in this guide. Take it from there so the address you set is always exact.
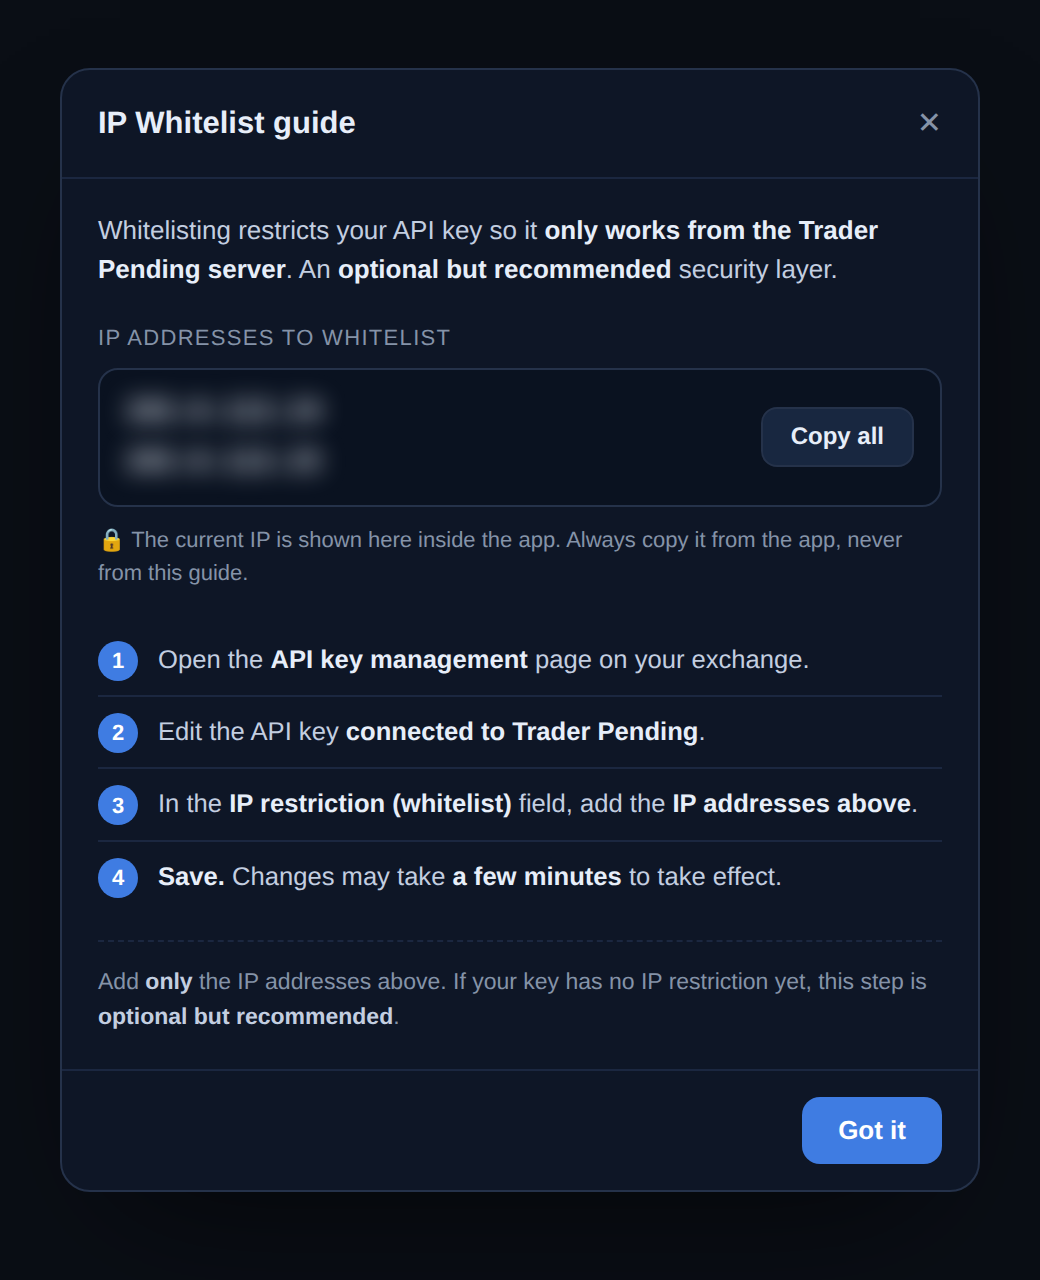
- Open the app, go to the API Keys tab, and click IP whitelist guide (or Set it up here on the connect form). Open Trader Pending. Do not have an account yet? Register first.
- Click Copy all to copy the shown IP address.
- On your exchange’s API key settings, in the IP restriction field, paste the address and save.
IP restriction changes can take a few minutes to take effect on the exchange side.
Save and copy
Section titled “Save and copy”Save the key. The exchange shows the API Secret only once, so copy your API Key and Secret now, before closing the page.
Step 2. Add the key to Trader Pending
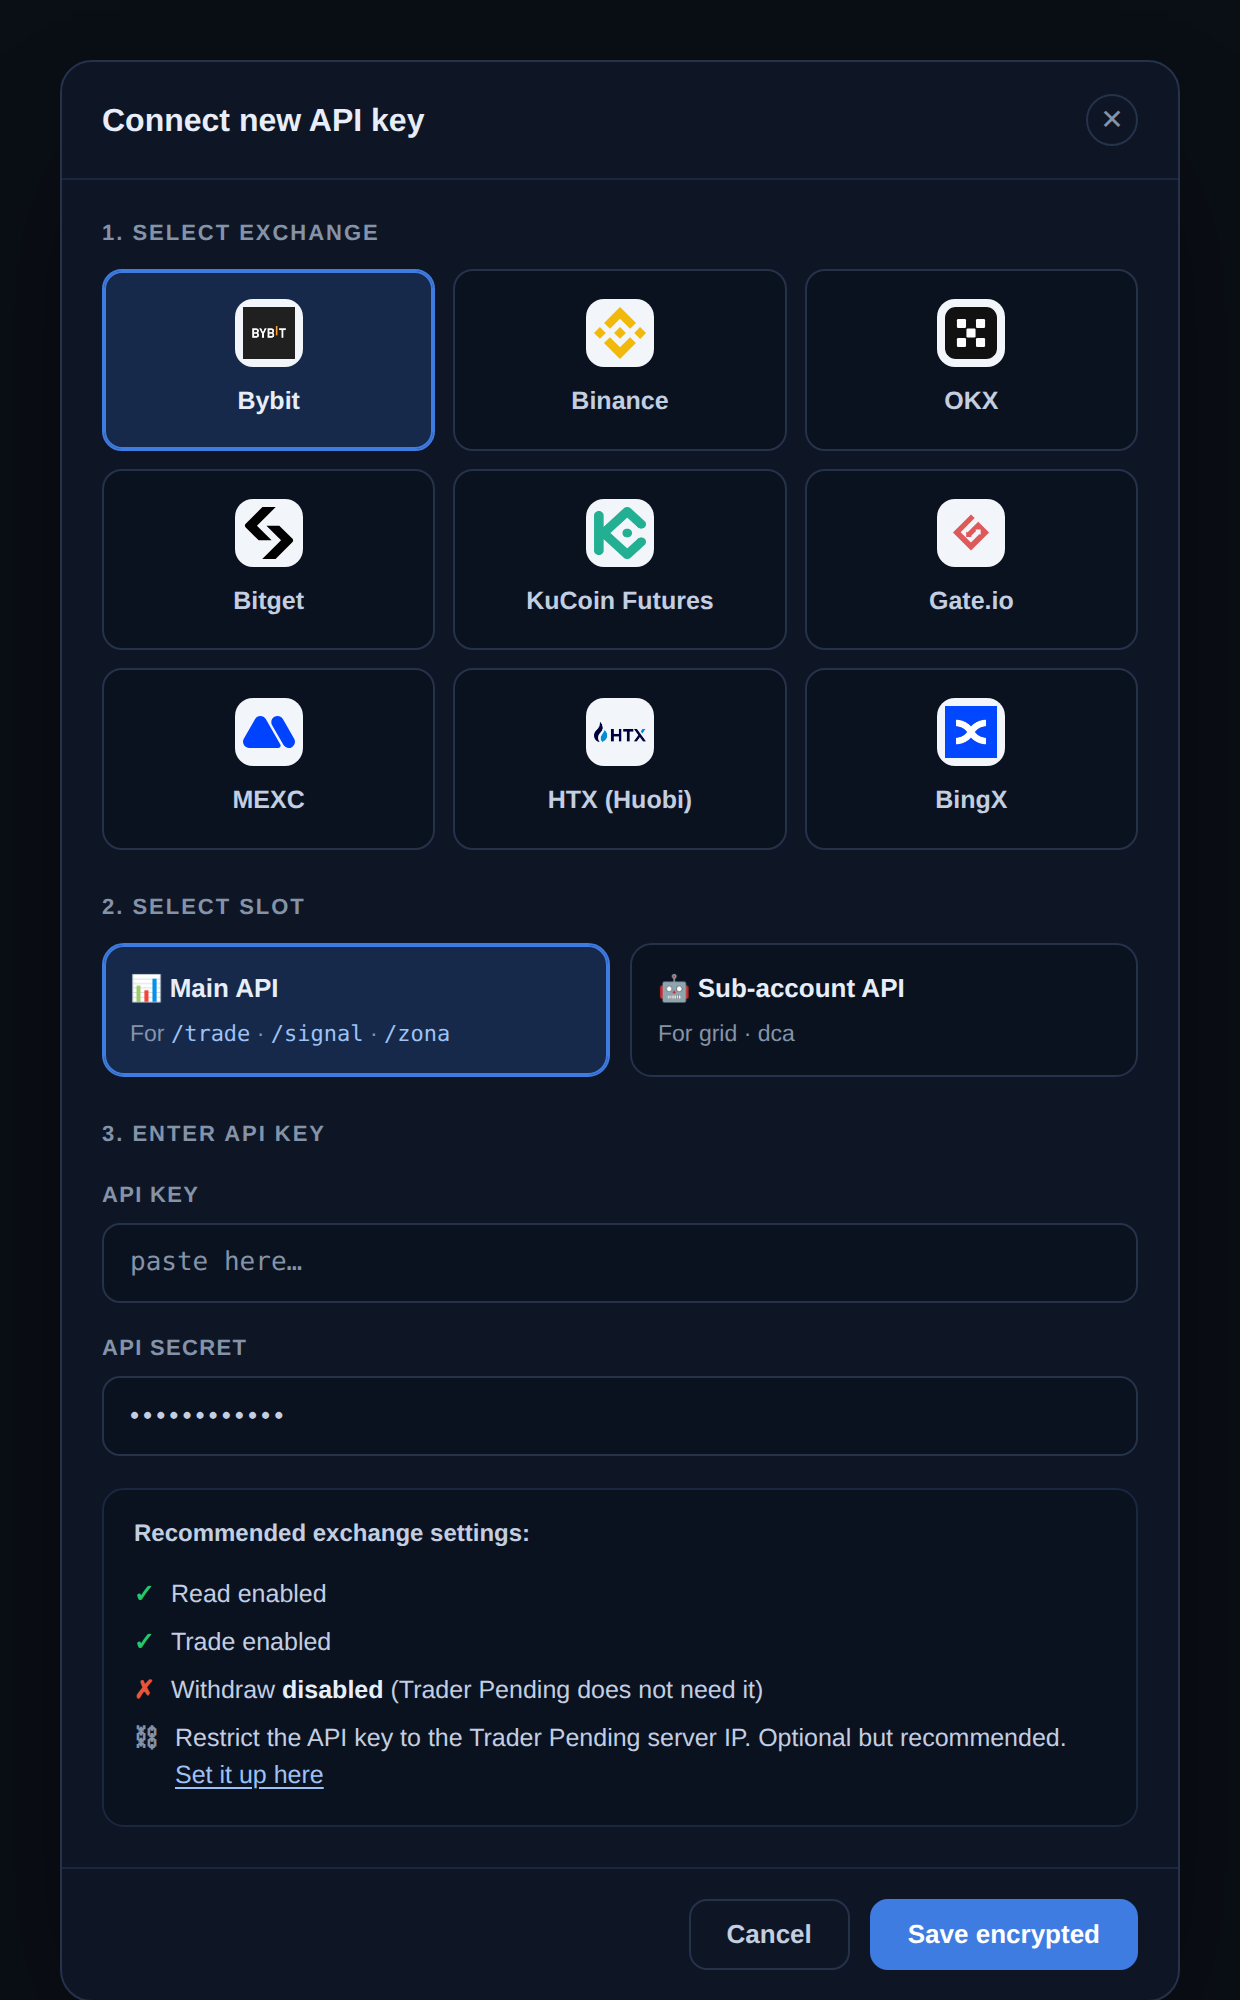
Section titled “Step 2. Add the key to Trader Pending”- Open the API Keys tab, then click Connect new key.
- Pick your exchange. Trader Pending supports Bybit, Binance, OKX, Bitget, KuCoin Futures, Gate.io, MEXC, HTX (Huobi), and BingX.
- Choose a slot (Pro plan only). On the Pro plan, choose Main API (for /trade, /signal, /zona) or Sub-account API (for grid and DCA). If this step does not appear, your single key is used for everything automatically. These modes are explained in Dedicated Bot Account.
- Paste the API Key and API Secret. If your exchange uses a passphrase (OKX, Bitget, KuCoin), fill in the Passphrase field too.
- Click Save encrypted. Trader Pending validates the key against the exchange automatically. If it is valid, the key appears on the exchange card right away. If it fails, the form explains why (for example, a wrong key or a mode mismatch).
Keys are stored encrypted and fully isolated from other users. Only the last four characters are shown for confirmation; the full key is never sent back to the browser or written to logs.
Step 3. Move funds to your Futures wallet
Section titled “Step 3. Move funds to your Futures wallet”This is the step most often missed. The bot reads your balance and executes orders only from the Futures/derivatives wallet, not from your Spot or Funding wallet. If your funds are still in Spot, Trader Pending will show a $0 balance and orders cannot be placed.
Open the fund transfer menu on your exchange and move funds into the Futures wallet for your exchange:
| Exchange | Move from | To wallet |
|---|---|---|
| Bybit | Funding / Spot | Unified Trading Account |
| Binance | Spot | USDT-M Futures |
| OKX | Funding | Trading (Unified) |
| Bitget | Spot | USDT-M Futures |
| KuCoin | Main | Futures |
| Gate.io | Spot | Perpetual Futures |
| MEXC | Spot | Futures |
| BingX | Standard Futures / Spot | USDⓈ-M Perpetual Futures |
| HTX (Huobi) | Spot | USDT-M Futures |
The Futures wallet name for your exchange is also shown right on the key card in the API Keys tab, with a short hint.
Step 4. Check the connection
Section titled “Step 4. Check the connection”Once the key is in place and funds are in the Futures wallet, confirm everything is ready from the API Keys tab.
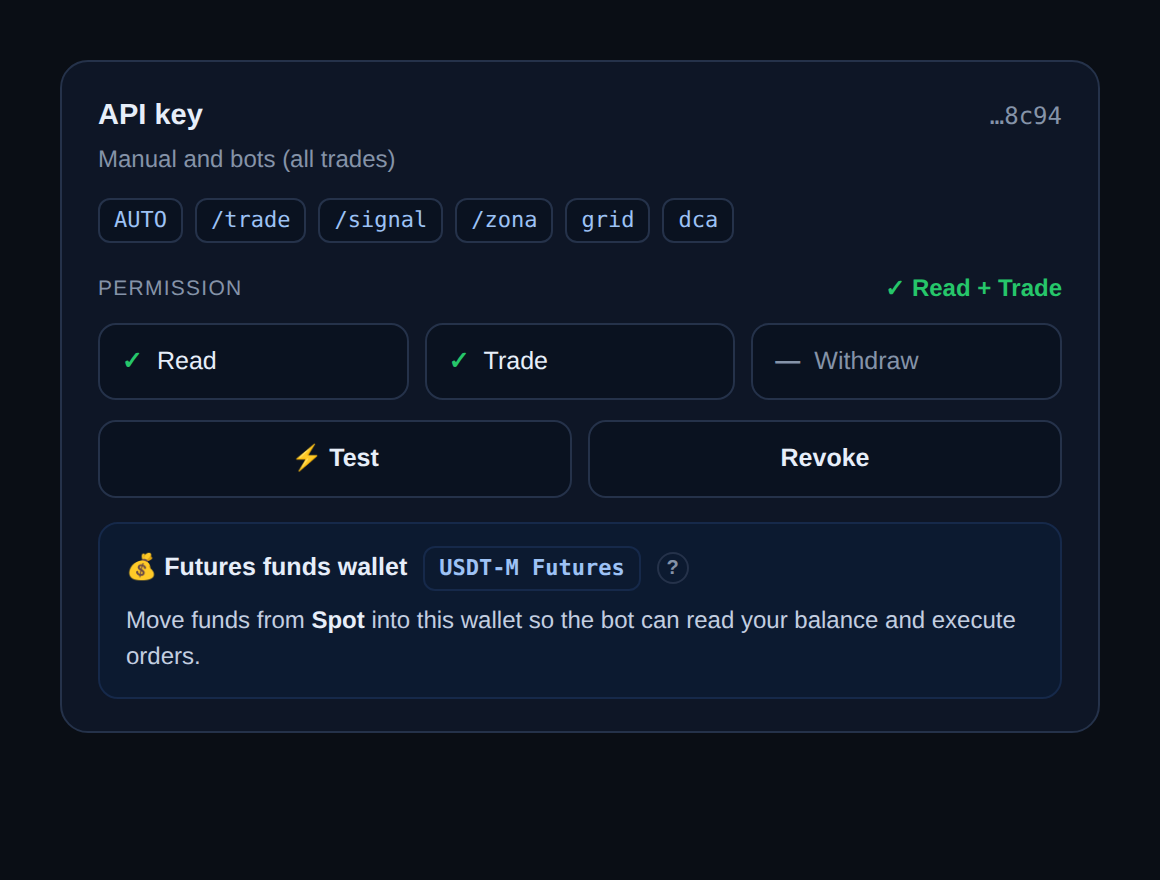
- Click Test on the key card to check connectivity and validity against the exchange.
- Look at the Permission row. It should read Read + Trade. If a red Withdraw enabled appears, turn off withdrawal permission on your exchange.
- Last used fills in as soon as the first action uses that key.
If something goes wrong
Section titled “If something goes wrong”- Balance reads $0. Your funds are probably still in Spot or Funding. Move them to the Futures wallet as in Step 3.
- Orders fail or are rejected on permission. Make sure the key covers Futures/contract trading, not Spot only (see Step 1).
- Validation fails on save. Check that the API Key and Secret are not swapped or partly copied, and if your exchange uses a passphrase, make sure it matches exactly what you set when creating the key.
- A Withdraw enabled warning shows. Turn off withdrawal permission on the key at the exchange; Trader Pending does not need it.
Next step
Section titled “Next step”If you are on the Pro plan and want to separate your bot capital and journal from manual trading within one exchange, continue to Dedicated Bot Account.